Showing posts with label Regency patterns. Show all posts

Feb 7, 2017

My Tidens Tøj Regency Gown (updated)

Original Gown

This Danish wedding gown has long been of interest to me, and this week I received the fabric that I'd had custom embroidered for it. The original can be seen at http://natmus.dk/historisk-viden/temaer/modens-historie/1790-1840/hvid-brudekjole/.

My version of the embroidery pattern

Closer up of fabric with white embroidery along the hem.

I've chosen a fine white cotton with matching thread for embroidery and will be making a size 12 using the pattern below, which is a screenshot of the pdf that is back online at http://natmus.dk/fileadmin/user_upload/natmus/historisk-viden/modens-historie/snitmoenster/hvid-brudekjole.pdf.


Below are the photos I took of this gown on my recent trip to Denmark. It was so fantastic to see it up close, right in front of me. Unfortunately, it was behind glass, so these are the best photos I could get.


Patterns you may wish to use to replicate this gown include:
  • Nehelenia's 1790 Chemise Dress Pattern (based on this exact gown) gives a good bodice base and overlay.
  • Sense & Sensibilities Elegant Ladies Closet Pattern is good to use for dress construction methods as this gown is constructed like the drawstring gown. I used the skirt pattern but adjusted the fabric widths to fit my gown - my front pieces were wider and I used 2.5m for the back panel. Another pattern you could try that I did not experiment with is the Laughing Moon Chemise Dress, but it does not have the pleated collar overlay and I am unsure how the front is gathered.
My recommendation for beginners/intermediate is to make the Sensibility drawstring gown with elbow length sleeves and add the overlay from the Chemise dress pattern.  It's not quite what I did but would probably end being a lot easier.

Dress Base:
I put together two of these from sturdy linen for the boned bodice
and one from fine linen for the lining. 

The bodice is boned with cotton cord.

The back is pleated over the top of the boned bodice.

Laced at the front.
Eyelets are sewn by hand using a thick linen thread
from Burnley & Trowbridge.

Back view of laced bodice.

Bodice Overlay:

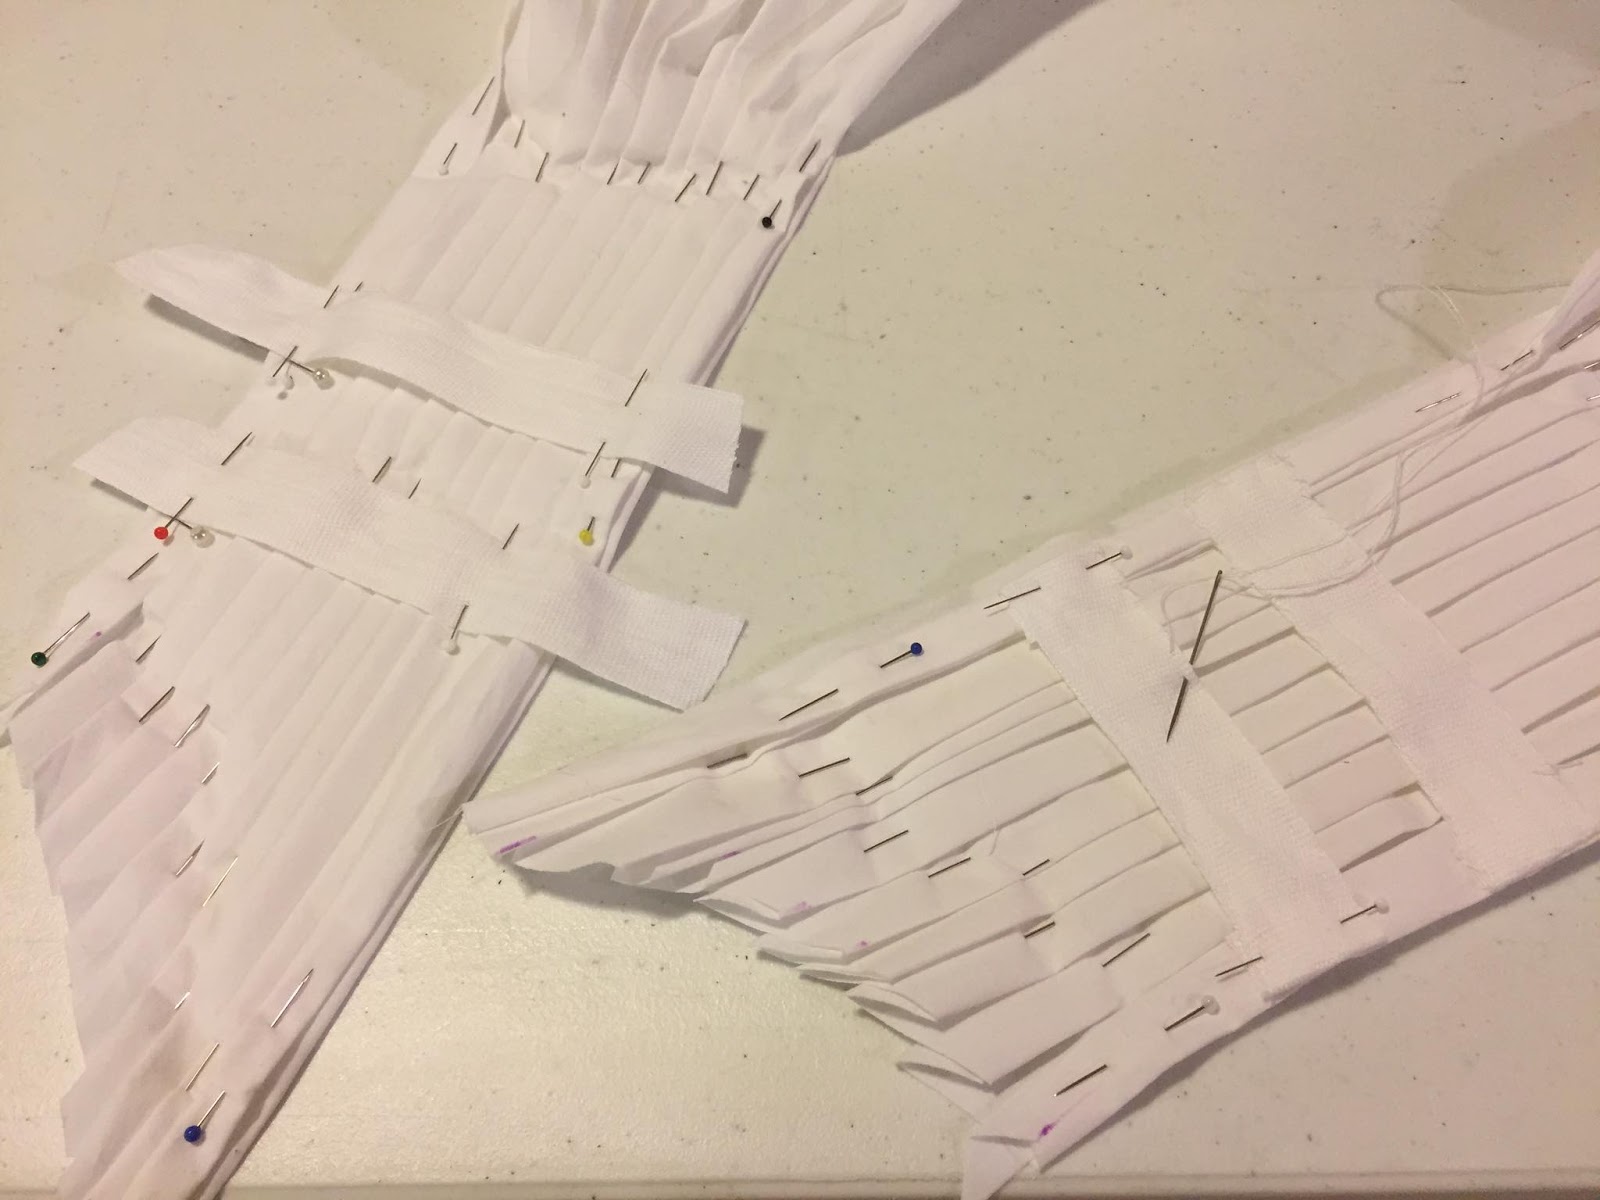
Pleated overlay with cotton stay tape as mentioned in the pattern instructions.

According to the instructions the ends are mounted onto cotton stay tape.

Tape pinned for sewing down.

Once the tapes are sewn down the back is sewn together by hand. 

Overlay is attached to the front skirt panel.
I made a french seam for tidiness and then ran a cotton tape through the casing.
Don't forget to sew the ends into the side seam before you finish constructing the gown.


Pleating the back and finishing off the gown:

2.5m fabric pleated onto the back.
Using 2" pleated I make a pleat facing towards center back,
pin it, then measure 1", stick in pin, and do next pleat to that pin. 

Starting to look like a dress at last!

3am selfie after sewing all night to get it finished. 

Front view with proper camera - must check my son's camera
settings because my iphone photos ended up a lot better than this.

Back view.
My husband wouldn't take the shawl away
so its a bit hidden.

Close up of the back. I must say white
is a really bad colour to photograph outdoors.


May 19, 2012

Finding Regency Era Patterns


    I'm often asked what commercial regency patterns are available and that I've used and can recommend. Below is a list of some that I've used - not all have easy-to-follow instructions and I definitely recommend you make a toile first.


Jan 11, 2009

Elegant Lady's Drawstring Dress Pattern #2

Make your neckline bias binding/drawstring casing from your fashion material, using the guide on the pattern sheet. Pin binding around the bodice neckline, beginning and ending at the center front and folding under the center front edges as shown in the instructions.


Stitch, taking care not to catch the bodice lining pieces as you go.


Trim seam allowance down to 1/4" and clip curves.


Fold under the raw edge of the binding and fold the binding to the inside of the neckline to create the drawstring casing.


Press neatly and pin in place.


Stitch, making small running stitches all the way around the neckline and making sure outside stitches are tiny, even and neat.

Jan 5, 2009

The Elegant Lady's Closet Drawstring Pattern

This historically accurate regency gown pattern is selling through Regency Reproductions and of late some home sewers have asked if there are any step-by-step photos demonstrating how to make this dress.

Here below are some quick photos in the hope they will be of assistance. The text used with the illustrations comes from the pattern instructions.


1. Bodice


Pin the bodice back and side back together, matching notches and easing curve as necessary.


Stitch.


Do note that the side back curve ends below the shoulder of the bodice back piece. This is correct and creates an inward curve for the sleeve.


Clip curves.


Press seam toward the side.


Press and fell both side back seams (see post on felled seams)


Make a narrow hem on the top, bottom, and front edges of the bodice front 'lining' pieces.
[I prefer to do a running stitch by hand here]


Pin and baste front lining piece on top of bodice front piece across the shoulder, around the armhole, and down the side seam, right side of lining to wrong side of bodice, matching up armhole edge and side seam. [my basting line is 10mm in from the edge]


Pin bodice front and back pieces together at shoulder seams, right sides together. Stitch.


Press seams toward the back of the bodice.


Fell both 'shoulder' seams.


Pin bodice side seams together ("lining" will be on top). Stitch, stopping at the first dot and resuming at the second dot.


[Snip thread between both, as long as you have knotted the thread. My machine does an automatic knot.]
$0 Web Hosting

Total Page Views