 |
| Pinned the sheer silk sari pieces, face together, to the blue lining, stitched 1cm seam. |
 |
| Kept the arm hold and waistline seams open. Turned it through, pressed and then sewed a 1cm casing channel. |
 |
| Front and back, turned through and pressed. Being careful to press on the lining side because of the gold trim. |
 |
| Pinning the two face together so the fashion fabric is a little longer than lining. |
 |
| Hand sew the fashion fabric together with a very tiny fine backstitch. When you lay it flat it looks like this. |
The most important step is to cut the bodice and sleeves first... then use the rest for the skirt. I flat line the bodice (attach a piece of cotton fabric to each pattern piece and use as one piece) on the straight of grain with cotton and use tiny french seams - do not flat line the skirts. Use a chemise & stays or a boned bodiced petticoat underneath. I use the decoration around the hem and sleeves. Silk saris are best for evening or ball gowns, cotton ones for daywear. Make sure you are getting a full sari of at least 5-6 metres or you will run short of fabric. A shorter amount can be used to make a sleeveless pelisse or overdress. When purchasing a sari online please note that craft silk or art silk are acetates, not silk. Also, it is easier if you are a short person - otherwise be prepared to drape until it meets your satisfaction.
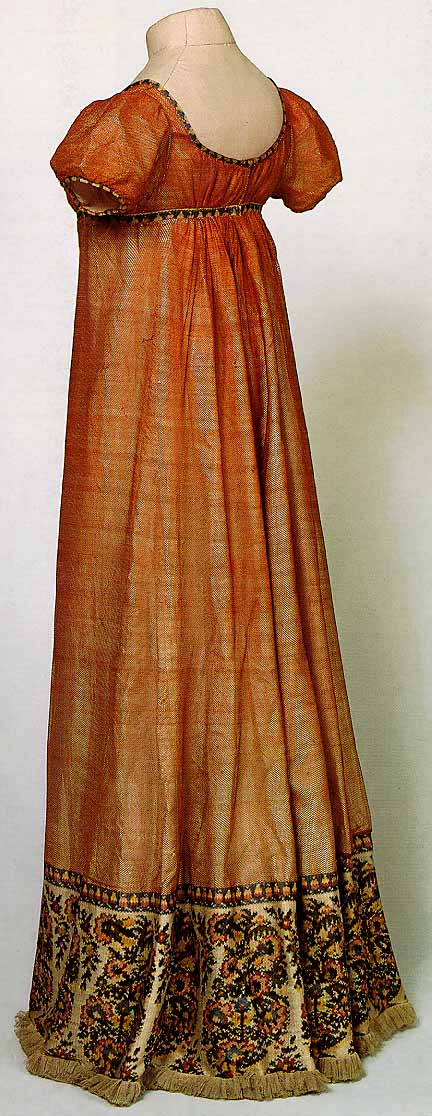
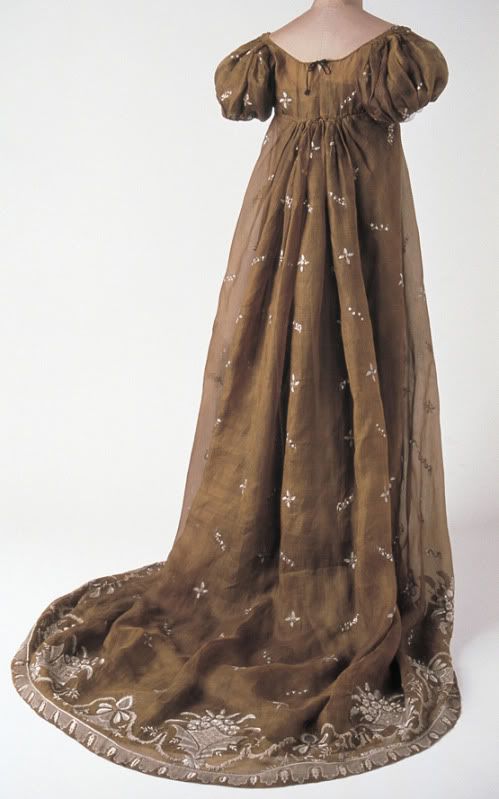
The next two pictures are from a previous post showing seams in an antique regency dress in my collection.


Over time I have been collecting links to Regency-era garments made from Saris and Shawls. There are many images of shawl gowns in my Pinterest folder.
 |
| Dress made from a woollen paisley shawl |
- Gown made of cotton sari http://www.manchestergalleries.org/the-collections/search-the-colle...
- Gown made of silk sari http://www.vam.ac.uk/content/articles/g/gown-made-from-a-shawl/
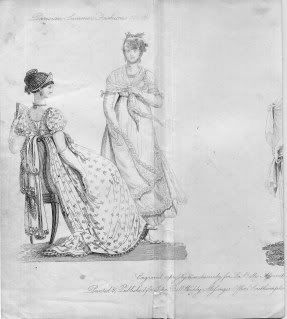
- Fashion Plate http://213.215.47.131/maciet2/map_zoom/prepare_visu.php?im_pos=15&collection_name=M5053MA_214X02X&collection_id=188
- Silk net gown in the Musée Historique de Tissu de Lyon. http://www.pemberley.com/janeinfo/reddress.jpg
- Fashion plate 1810 http://content.lib.washington.edu/cdm4/item_viewer.php?CISOROOT=/co...
- Shawl dress http://content.lib.washington.edu/cdm4/item_viewer.php?CISOROOT=/co...
- http://ccdl.libraries.claremont.edu/cdm4/item_viewer.php?CISOROOT=%...
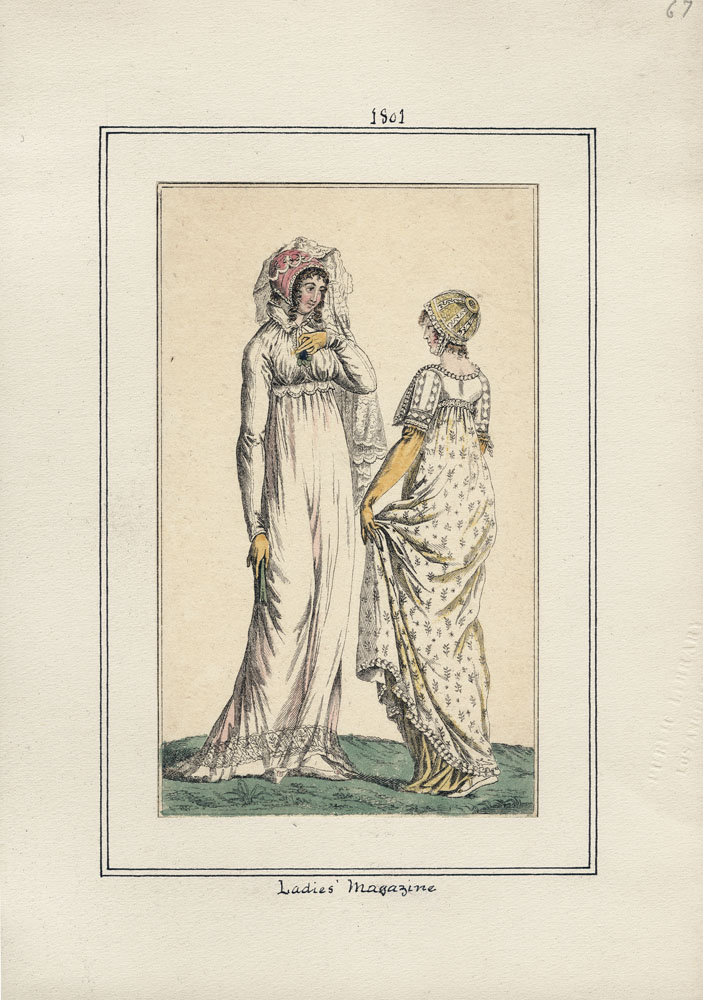
- Fashion Plate 1801 http://dbase1.lapl.org/images/casey/full/01/rbc0068.jpg
- Tunic1806 http://dbase1.lapl.org/images/casey/full/01/rbc0179.jpg
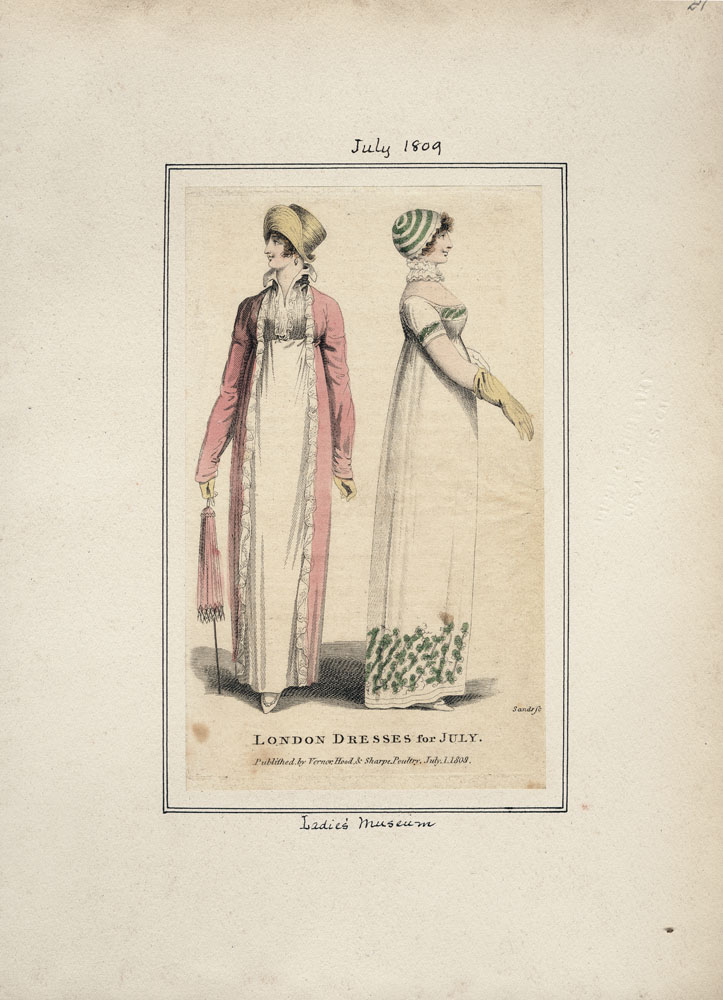
- 1809 http://dbase1.lapl.org/images/casey/full/01/rbc0262.jpg
- 1810 http://dbase1.lapl.org/images/casey/full/01/rbc0282.jpg
- Dawn's images http://img.photobucket.com/albums/v320/DLuckham/Regency%20Dresses/r...
- Suzi's images http://i7.photobucket.com/albums/y260/Sistersuzi/1806ParisianSummer...
- Coat http://www.costumes.org/history/regency/ackerman1809to1828/promenademerino.jpg
- Overdress http://picasaweb.google.com/101938061106280749419/PrideAndPrejudiceResearch#5381911946177924210
- V&A dress http://collections.vam.ac.uk/item/O13827/jacket/
- V&A dress http://collections.vam.ac.uk/item/O74453/dress/
- Percalee Importee http://s269.beta.photobucket.com/user/DawnLuck/media/Fashion%20Plates/sari1.jpg.html
- 1810 http://s269.beta.photobucket.com/user/DawnLuck/media/Fashion%20Plates/sari2.jpg.html
Apologies if any links are broken - if you find any broken links or have any further links to share please use the comments box below.


