 |
| Original Gown |
This Danish wedding gown has long been of interest to me, and this week I received the fabric that I'd had custom embroidered for it. The original can be seen at
http://natmus.dk/historisk-viden/temaer/modens-historie/1790-1840/hvid-brudekjole/.
 |
| My version of the embroidery pattern |
 |
| Closer up of fabric with white embroidery along the hem. |
I've chosen a fine white cotton with matching thread for embroidery and will be making a size 12 using the pattern below, which is a screenshot of the pdf that is back online at
http://natmus.dk/fileadmin/user_upload/natmus/historisk-viden/modens-historie/snitmoenster/hvid-brudekjole.pdf.
Below are the photos I took of this gown on my recent trip to Denmark. It was so fantastic to see it up close, right in front of me. Unfortunately, it was behind glass, so these are the best photos I could get.
Patterns you may wish to use to replicate this gown include:
- Nehelenia's 1790 Chemise Dress Pattern (based on this exact gown) gives a good bodice base and overlay.
- Sense & Sensibilities Elegant Ladies Closet Pattern is good to use for dress construction methods as this gown is constructed like the drawstring gown. I used the skirt pattern but adjusted the fabric widths to fit my gown - my front pieces were wider and I used 2.5m for the back panel. Another pattern you could try that I did not experiment with is the Laughing Moon Chemise Dress, but it does not have the pleated collar overlay and I am unsure how the front is gathered.
My recommendation for beginners/intermediate is to make the Sensibility
drawstring gown with elbow length sleeves and add the overlay from the
Chemise dress pattern. It's not quite what I did but would probably end being a lot easier.
Dress Base:
 |
I put together two of these from sturdy linen for the boned bodice
and one from fine linen for the lining. |
 |
| The bodice is boned with cotton cord. |
 |
| The back is pleated over the top of the boned bodice. |
 |
| Back view of laced bodice. |
Bodice Overlay:
 |
| Pleated overlay with cotton stay tape as mentioned in the pattern instructions. |
 |
| According to the instructions the ends are mounted onto cotton stay tape. |
 |
| Tape pinned for sewing down. |
 |
| Once the tapes are sewn down the back is sewn together by hand. |
 |
Overlay is attached to the front skirt panel.
I made a french seam for tidiness and then ran a cotton tape through the casing.
Don't forget to sew the ends into the side seam before you finish constructing the gown. |
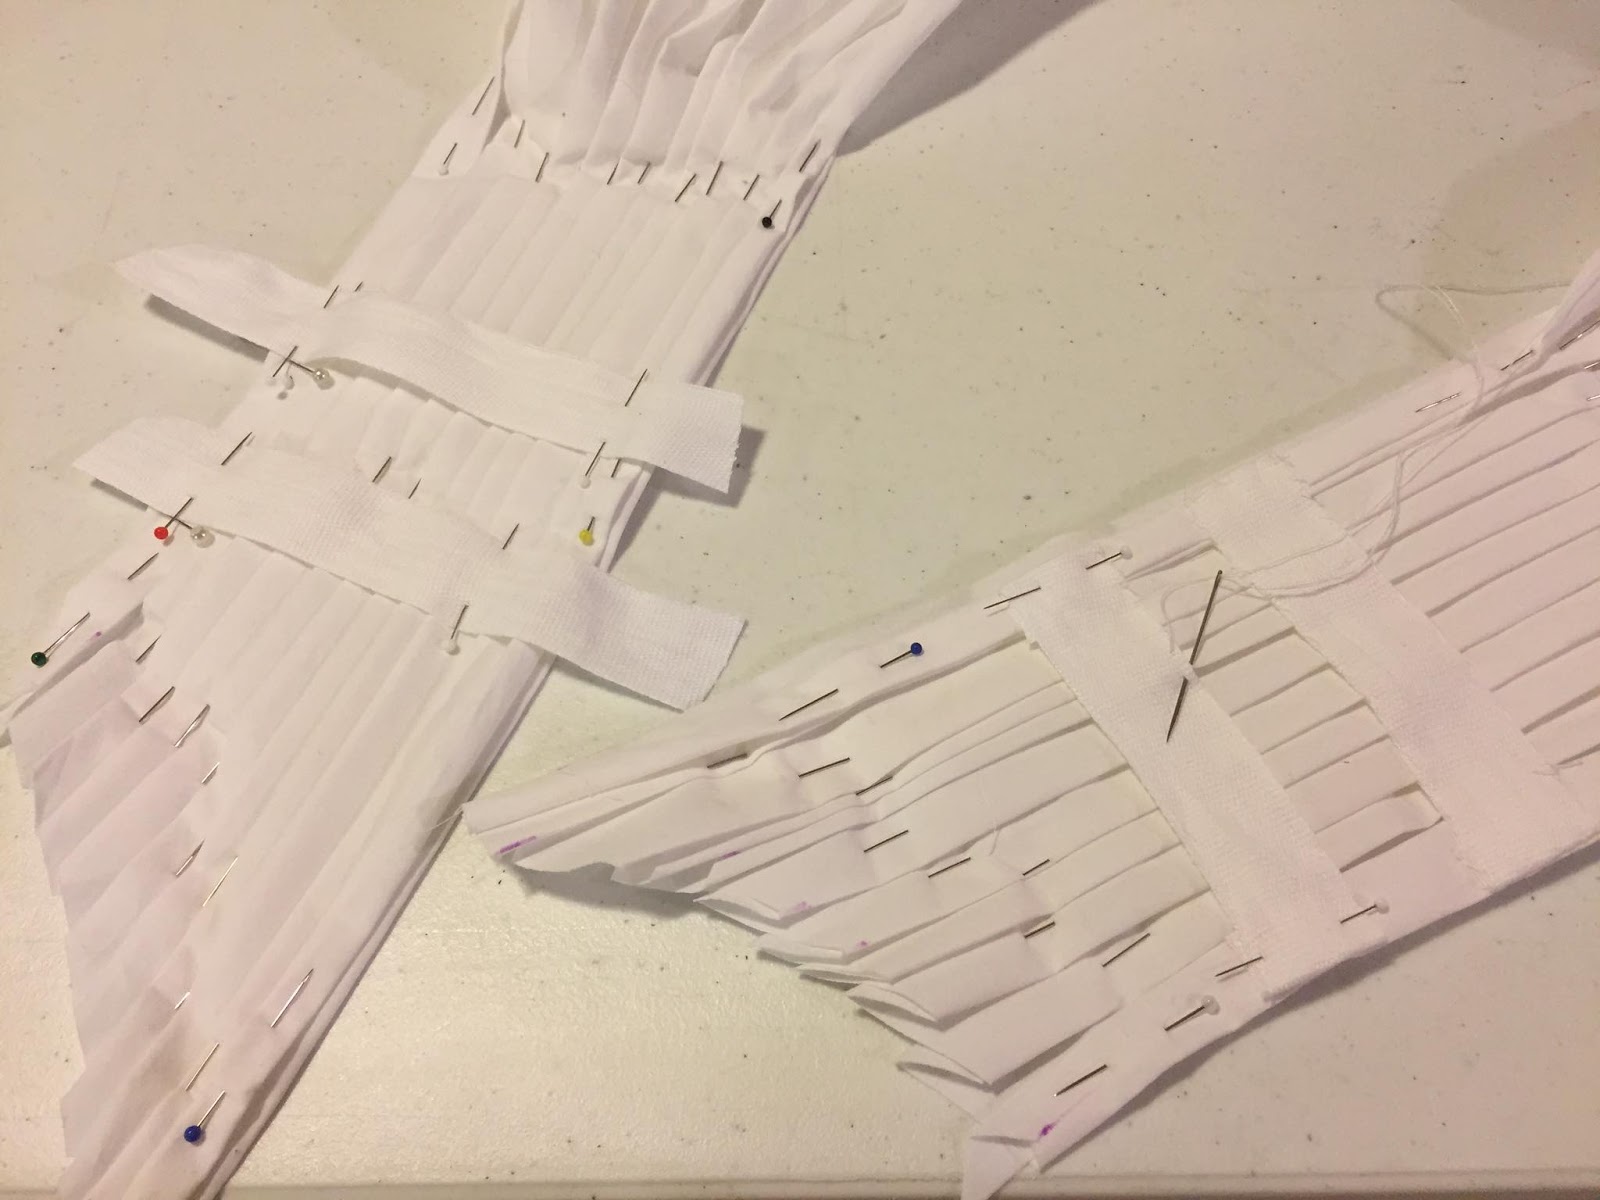
Pleating the back and finishing off the gown:
 |
2.5m fabric pleated onto the back.
Using 2" pleated I make a pleat facing towards center back,
pin it, then measure 1", stick in pin, and do next pleat to that pin. |
 |
| Starting to look like a dress at last! |
 |
| 3am selfie after sewing all night to get it finished. |
 |
Front view with proper camera - must check my son's camera
settings because my iphone photos ended up a lot better than this. |
 |
Back view.
My husband wouldn't take the shawl away
so its a bit hidden. |
 |
Close up of the back. I must say white
is a really bad colour to photograph outdoors. |


13 comments:
Hurray! I can't wait to see your version of the dress. It will be splendid!
I'm so jealous you saw it in person! Not just that gown but the others in that collection! It's my favourite extant of all. I had eight yards of sheer fabric embroidered through etsy, it was done somewhere in Asia. Unfortunately, I had asked for voile, and I got some sort of synthetic sheer. I wasn't happy. I still made a gown from it, a bib-front, but it was flimsy fabric and it just kept snagging and laddering, so I had to throw it away. I may attempt to do it again. :)
Good luck with it. I am currently reproducing an 1885 ball gown. Do you know about my study tour to U.K. for April 2012?
Visit my site: jhisey.blogspot.com for complete details. Still have room left.
Hi Aylwen,
Don't you just love the little museum with such a beautiful collection? I saw this collection about 6 years ago. I had the whole museum to myself for a large part of my visit.
Looking forward to seeing your creation. :)
Because I am working on client sewing commissions I have had to put this project on hold. But rest assured, it will be completed this year - the fabric is ready and when I have spare moments I am drafting up the pattern. Keep watching the blog and updates will be announced.
Hey, do you still have the pattern on your computer? I've been lookin for it (since I first heard about it) all over but it's not on their sight anymore.
I was wonering if you could email it for me or something...
Dear Material World
Your study tour sounded fantastic - so sorry I couldn't join you. My excuse was that same date I was running the Jane Austen Festival Australia! Do let me know how it went - I'd love to see your photos!
Dear Susulone
I have found a screenshot of the pattern. Hope it helps a bit.
I have a printed version of the pattern translated by Ida Sonberg. I can scan it.
That would be fantastic! Thank you very much :)
Thank-you so much for saving the pattern and for taking those fabulous photos of the dress. I'm so sad the museum took the original down, but this is the next best thing!
Time flies and I'm still trying to finish this dress! I cut out the lining today - here's hoping I can get it done before the end of the month!
Beautifully done, and such a detailed post. Thank you for providing such detailed step by step instructions.
Post a Comment